Qortal Project

The future of blockchain platforms

User Tools

Site Tools


Sidebar

Qortal Project Wiki

Important Notices

Introduction

Project Model

Minting

Communications

Trade Portal

Qortal Hosting (QDN)

Voting System

AT System

Hardware

Frequently Asked Questions (FAQ)

How-To Guides

Node Setup Guides

Third-Party Services

raspberry_pi

Raspberry Pi SBC's

Please note: after setting up your computer as a node, be sure to review the Port Forwarding guide to ensure your node functions optimally.

Build your own QORTector or buy one pre-built at https://crowetic.com! Please note: this guide is for building your own Raspberry Pi from scratch with a BrooklynR OS. For those who have purchased a QORTector from https://crowetic.com please go to QORTector Walkthrough

Raspberry Pi 4 Configuration Recommendations

  • Raspberry Pi 4B 8GB (4GB will work but 8GB is recommended)
  • Power Supply
  • Case with fan (fan is important!)
  • USB 3.0 SSD 500GB or above (128GB microSD will work but SSD is recommended)


Raspberry Pi 5 Configuration Recommendations

  • Raspberry Pi 5 8GB (4GB will work but 8GB is recommended)
  • Power Supply
  • Case with fan (fan is important!)
  • USB 3.0 SSD 500GB or above (128GB microSD will work but SSD is recommended)


Preparations on your PC/Desktop computer

  1. To flash image on SSD and SD, download Balenaetcher : Select OS on site / or for Windows only - another option - win32diskimager: https://sourceforge.net/projects/win32diskimager/
  2. Only if using SD card (not recommended), download SD Memory card formatter: Select OS on site
  3. Download 7-zip (to unpack the image) : Windows (64bits) , Windows (32bits)
  4. For Mac users download Keka(to unpack the image) : macOS
  5. Download Remote desktop client to access PI from your MAC or Windows computer (used for Desktop GUI images)OPTIONAL can use SSH: Select OS on site
  6. Download latest supported image on your computer in preparation to flash on ssd of pi4:


How To Install QortalOS and Qortal Core

  1. only for SD card, Format SD card with FAT32/FATX using SD Memory Card Formatter on your computer
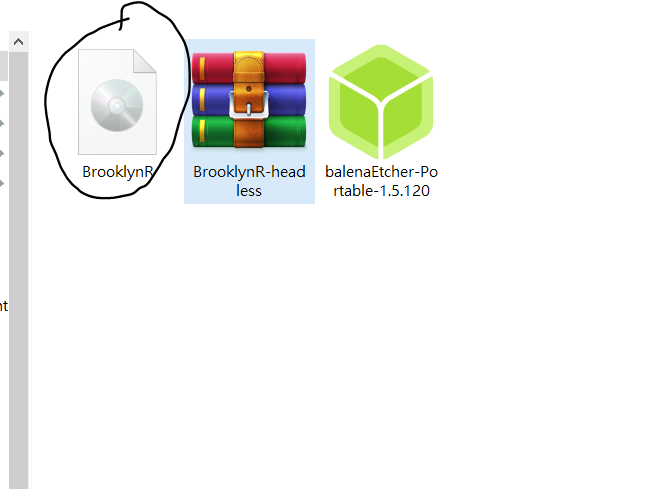
  2. Use 7-zip or Keka on your computer to extract the downloaded image, you will get a file with Disc icon (circling in picture)
  3. Connect your SSD drive or sd card to your computer to usb port for flashing the unpacked image
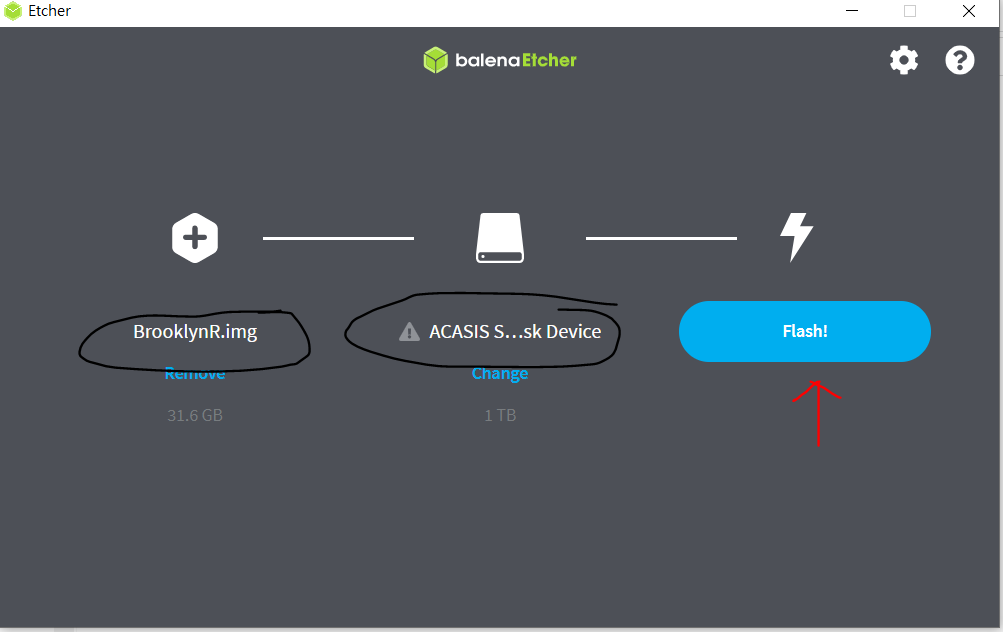
  4. Open Balena etcher on your computer, select the image you extracted, select SSD drive or microSD card , click ‘flash’!
  5. Once it finishes flashing the image, disconnect from computer the SSD or microSD card plug into to Pi, connect Pi to router via ethernet cable (recommended) and power on the Pi.
  6. Power on the Pi and wait a few minutes to start. In the meantime, log into your router to locate the IP address of your Pi for SSH or use of remote desktop to access PI via computer. Always good idea to check that your PI is now listed in your connected devices. This is even if you are using a monitor, keyboard, and mouse where RDP is not needed.
  7. If you are going headless (using a different computer to log into the Pi desktop) then on Windows/Mac/Linux open up Remote Desktop Connection (Microsoft Remote Desktop Client or Remmina for Linux)
  8. Enter the IP for your Pi and click ‘connect’. Click ‘yes’ when it asks about connecting and if you trust the certificates.
  9. Log in. Username: pi Password: dmax911e
  10. Once Desktop loads you Open a terminal session to Expand the the filesystem:
    sudo raspi-config 
  11. Raspi-config screens will pop up. Scroll down to advanced settings using arrow keys, hit enter, select expand file system and select it. When it is done select ‘exit’ and it will ask for you to reboot. Click ‘yes’
  12. Log in again. Username: pi Password: dmax911e
  13. Open a terminal session to update system/apps(copy and paste as is command below):
    sudo apt update && sudo apt -y upgrade
  14. once done system/apps update, download, extract and run latest core with this one command in terminal (copy and paste as is command below):
wget https://github.com/Qortal/qortal/releases/latest/download/qortal.zip && unzip qortal.zip && cd qortal && chmod +x *.sh && ./start.sh

You will see qortal logo and bootstrap process, let it run and then the core will sync up with the chain.

How to Install Qortal UI via scripts with associated UI launcher

Type in Terminal session (press return after each command):

cd

wget https://raw.githubusercontent.com/xspektrex/QORTectorScripts/master/uninstall_ui.sh

wget https://raw.githubusercontent.com/xspektrex/QORTectorScripts/master/update_install_ui.sh

wget https://raw.githubusercontent.com/xspektrex/QORTectorScripts/master/launch_UI.sh ((move to desktop via GUI file manager)

Make the script/s executable:

via terminal, immediately after terminal load, with chmod +x *.sh

Via GUI with (Right-click -> Properties -> Permissions) and check the "make executable" box.

Cut/paste UI launcher from home to desktop( via GUI file Manager)

Now run the update_install or uninstall script/s via terminal:

sudo ./uninstall_ui.sh
(optional this will enable a clean install, recommended first time after flashing a new image)

sudo ./update_install_ui.sh
(when you see the line "Build Complete, You can use your new UI" its done)


How to Run Qortal UI via UI launcher

Launch the Qortal UI via the UI launcher, double click on the icon on desktop

For more info on these scripts developed by Hfactor visit: https://github.com/xspektrex/QORTectorScripts

How to install and Run new Qortal UI app image

In terminal session, you will download the Raspberry Pi Qortal UI (arm64 64bit .AppImage) - Qortal UI:

cd

cd Desktop

wget https://github.com/Qortal/qortal-ui/releases/latest/download/Qortal-Setup-arm64.AppImage

once completed in terminal, go to the Desktop and update the file called Qortal-Setup-arm64.appimage as follows:

Right Click on file called Qortal-Setup-arm64.appimage, choose Properties

First tab change name to Qortal-UI

Select Permissions tab, tick Allow executing file as program, then close

Double click on the Qortal-UI file and the Qortal UI login will appear.

Note: For Headless images, you will access your pi via ssh from your computer.

First set up an ssh tunnel as shown on this page SSH tunneling and keep it open : http://wiki.qortal.org/doku.php?id=ssh_tunneling.

Then in terminal on your computer enter: ssh pi@ip address assigned in your router. You will be prompted for Username: pi Password: dmax911e (password will not display when typing)

How To Access Your Pi Remotely via RDP

This walkthrough will illustrate using Microsoft Remote Desktop client on a Mac laptop (see in ‘Preparations’ section above where to download the client for your computer OS):

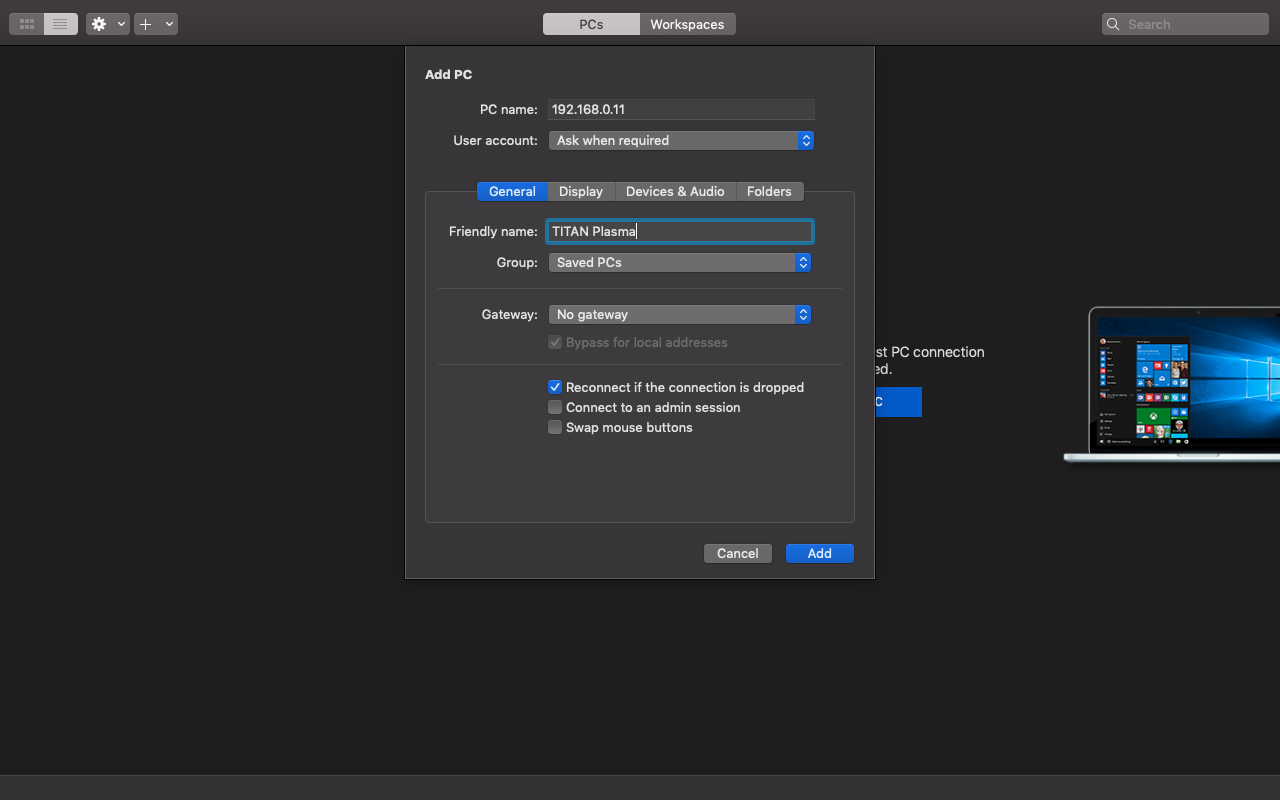
1. Click on 'Add PC' and define the connection for Pi TITAN, in this example shows connecting via ip address located earlier from the connected devices in our router/modem. Another option would be via hostname: titan.local (just replace the 'titan' portion with whatever version your device is - such as 'plumbus' for QORTector customers).

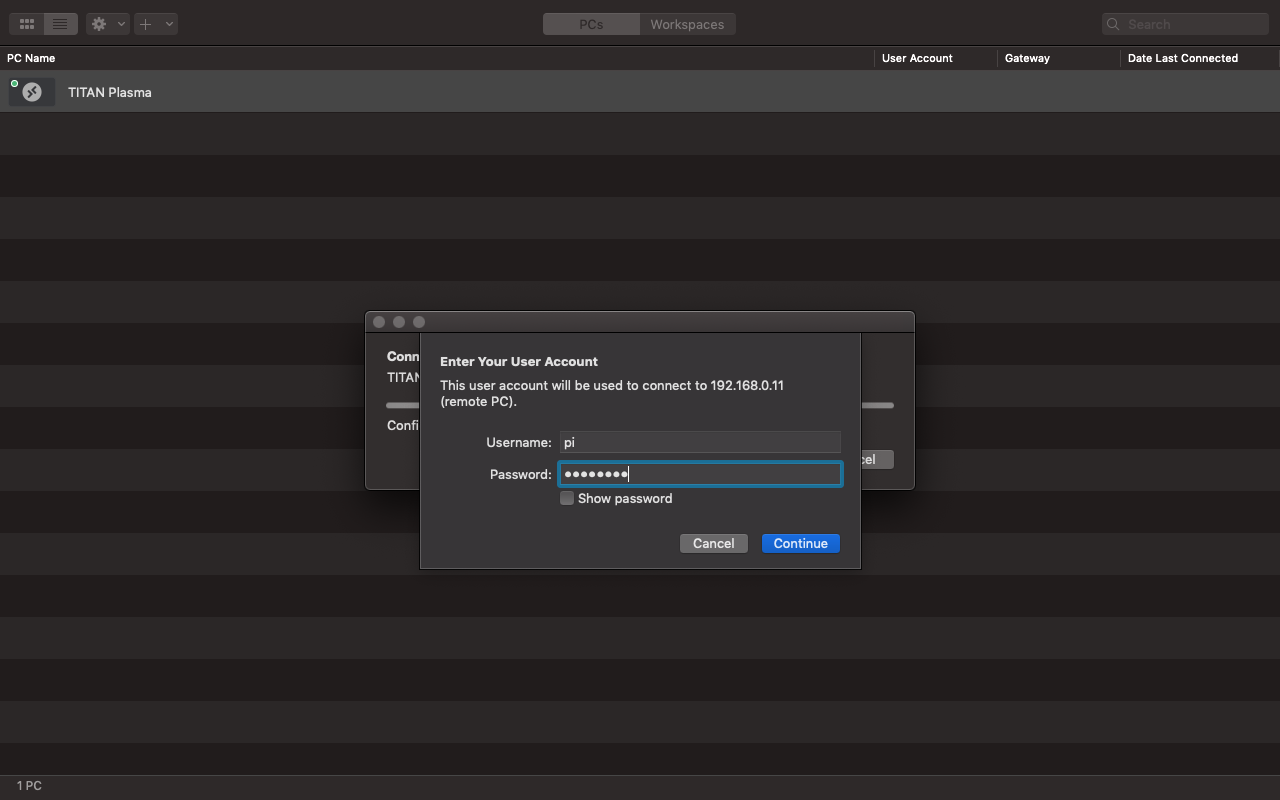
2. Double click on RDP connection for TITAN PLasma just created and enter Username: pi Password: dmax911e

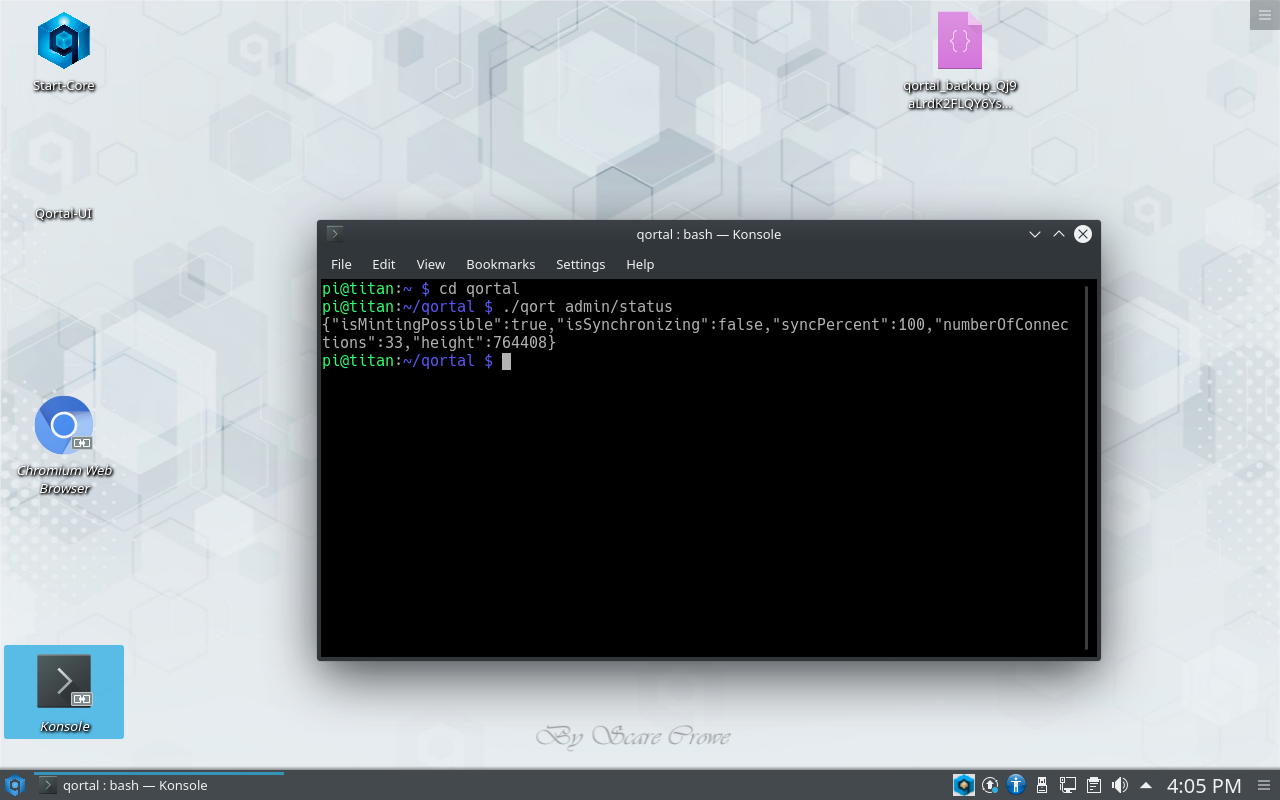
3. Pi desktop GUI is now fully available:

raspberry_pi.txt · Last modified: 08/18/2024 10:28 by hfactor